

Flashing a custom ROM wipes your phone. Everyone knows that part. What catches people out is discovering afterwards which data no backup they made ever contained: the authenticator seeds, the offline game progress, the banking app that needs a branch visit to reactivate. A full backup before custom rom no root installation is really four separate backups wearing one name, and this guide separates them so nothing falls between the tools. Work through it in order, verify each layer, and only then unlock anything.
Layer 1: the account-level data that syncs itself (mostly)
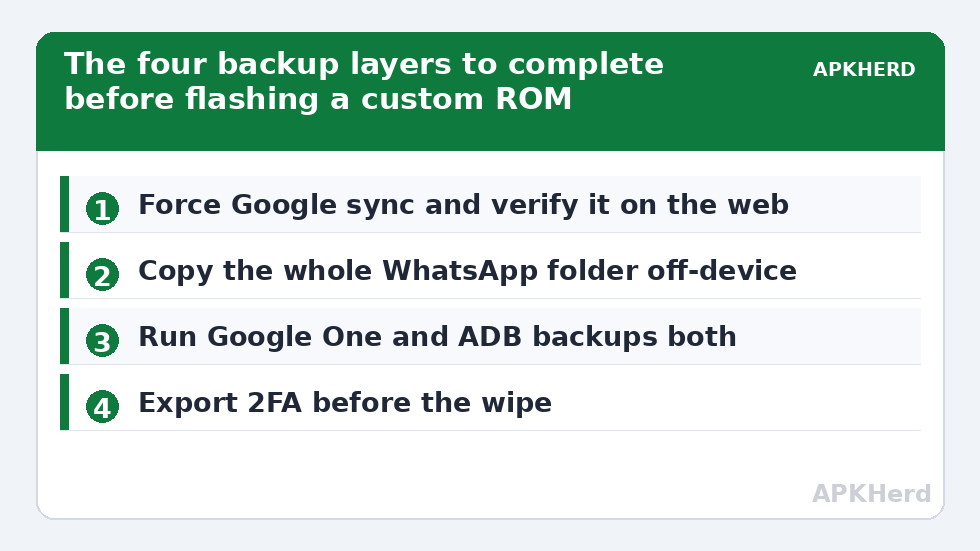
Contacts, calendar, photos, and Drive files tied to your Google account will return after you sign in — if sync is actually on and actually current. Do not assume. Open Settings, check the last sync time for your account, and force a sync now. Then verify from a second surface: contacts.google.com and photos.google.com on a computer should show today’s data. Sync failures are silent and common, especially for contacts saved to device-only storage, which never sync at all. Export device contacts to a .vcf file manually as insurance; our contacts and calendar reliability guide covers the device-versus-account trap in detail.
Layer 2: messages, call logs, and WhatsApp
SMS and call logs need a dedicated tool. Swift Backup handles both without root and exports them in readable form; store that export somewhere safe, keeping in mind it is unencrypted — see the security notes in our Swift Backup complete guide. WhatsApp gets its own step because a ROM flash is exactly the scenario its local backup exists for: run a fresh chat backup inside WhatsApp, then copy the entire WhatsApp folder (with its Databases and media) off the phone. Restoration from that local copy is covered step by step in our WhatsApp local backup guide. If you use any other messenger with local-only history, open it and find its export or backup function now, not later.
Layer 3: app data — the hard part without root
| Method | Captures | Misses |
|---|---|---|
| Google One backup | App data for allowBackup-permitting apps, up to per-app limits | Opted-out apps; data restored only during setup or via Settings restore |
| ADB backup | Same permitted-set data, into an archive you control | Same opted-out apps; deprecated and flaky on newer releases |
| In-app exports | Exactly what each app chooses to offer | Apps that offer nothing |
| OEM switch tools | Broad categories for migration | Useless if the ROM changes the device personality or the tool refuses |
Run Google One backup manually (Settings → Google → Backup → Back up now) and also take an ADB backup of your critical packages individually using the method in our ADB no-root guide. Then walk your app drawer and make a hit list of apps whose data lives nowhere else: authenticator apps (export or screenshot-free transfer flow per vendor — see our 2FA backup guide), offline games (check for a save folder in Android/data and copy it), note apps without accounts, and any banking app (expect reactivation; have your card and ID ready).
Layer 4: the raw storage dump
Connect the phone by USB and copy the entire visible internal storage to a dated folder on your computer: DCIM, Pictures, Download, Documents, WhatsApp, and any app-named folders, plus Android/data if your file manager and Android version allow access (scoped storage restricts this on recent versions; an ADB pull of specific folders sometimes reaches further than a phone-side file manager). This raw copy is ugly and complete — it catches the files every structured tool forgets, like the PDF in a random Downloads subfolder you will need in six months.
Pre-flash verification checklist
- Google sync confirmed current from a web browser, not just the phone’s toggle.
- WhatsApp folder copied off-device and size plausible (GBs, not MBs, if you have media).
- ADB backup restored-tested on one expendable app; archive size sane.
- 2FA export/transfer completed and stored offline.
- Internal storage dump completed; spot-open three files from it.
- A second copy of the whole backup set exists on another drive — 3-2-1: PC folder, external drive, and (encrypted) cloud or off-site for the irreplaceable parts.
- You know your Google account password and can receive its 2FA — you will need it on the fresh ROM, where FRP sign-in is mandatory.
That last point is the one that bricks weekends: after a wipe, Android’s Factory Reset Protection demands the previous Google account credentials. A perfect data backup plus a forgotten password equals a locked phone.
Full backup before custom rom no root recovery: if something goes wrong mid-flash
Your safety net is breadth, not any single tool. Because you layered account sync, message exports, app-data attempts, and a raw dump, a failed layer costs you one category instead of everything. If the custom ROM does not work out, returning to stock and restoring in the same layered order recovers most of a normal setup within an hour. For the open-source, ROM-friendly backup tool designed for exactly this audience, read our Seedvault guide next — on many ROMs it can be baked into your post-flash life permanently. And keep the whole set organized using the hub at backup tools.
Special cases people forget until the wipe screen
Work profiles and dual apps: data inside a work profile or a cloned-app container (Samsung Dual Messenger, Shelter/Island setups) is usually invisible to consumer backup tools. Export from inside those apps individually, or accept their loss consciously. Call recording and voice recorder apps: their files often live in app-specific folders — include them in the raw storage dump and verify by opening one recording from the PC copy. Offline maps and media: downloaded regions in Maps, offline playlists, and podcast queues re-download painfully on slow connections; note what you had, even if re-downloading is the only restore path. Launcher and widget layouts: screenshot every home screen. Rebuilding a tuned setup from memory takes longer than the flash itself. Bluetooth pairings and Wi-Fi passwords: Wi-Fi passwords ride along with Google device backup; Bluetooth pairings do not meaningfully restore — budget ten minutes of re-pairing headphones, watch, and car.
Finally, photograph your backup checklist itself as you complete it. If the flash goes wrong at midnight, the written record of what you saved — and where — is the difference between a methodical restore and a panic.
Label and store the backup set like you mean it
Name the folder with the device model, the date, and the ROM you are leaving — “Pixel7-stock-2026-10-17” beats “backup_final_v2” in every future search. Keep the set intact until the new ROM has survived a full week of daily use: the moment people delete the old backup is, with eerie reliability, the day before they discover the one thing missing. Storage is cheap; regret is not.
Frequently Asked Questions
Can I make a true full (image-style) backup without root?
No. A bit-for-bit image of app data partitions requires root or a custom recovery with the right permissions. Without root, the layered approach in this guide is the practical ceiling — broad, but with known gaps per app.
Will Google One restore my apps on the custom ROM?
If the ROM includes Google services and you sign in, the backup can restore during setup for ROMs that support it. Many custom ROMs do restore Google backups; some de-Googled builds cannot, by design. Test expectations against your specific ROM’s documentation.
How long does this whole process take?
Typically 45–90 minutes, dominated by the USB storage copy and the ADB backup of large apps. Do not compress it into the same hour as the flash itself; back up the day before.
Do I need to back up the SD card too?
If apps store data there, yes — but note many ROM installs leave a removable SD untouched. Copy it anyway; cards fail, and the copy is cheap while the cable is already connected.
What about my eSIM or phone number?
A ROM flash does not normally erase eSIM profiles, but carrier quirks exist. Screenshot or note your eSIM details in your carrier app and confirm the carrier’s re-provisioning process before you wipe.